By Ali Meller
Ali Meller re-launched Albacore 4862 at the 1998 PRSA Fall Frostbite, after a rebuilding project that took two years (with long breaks). This article discusses the reasons for the rebuild, some of the alternatives considered, how the rebuild was done (with photographs), and initial results.
Why?
Why rebuild such an Albacore, when better boats are available for not much money?
Freud would have a field day with me.
Albacore 4862 is a 1973 Skene, built for my late father. He had Skene install the racing deck during the mid ’70s. This was somewhat of a custom project, since Skene had changed the hull mold in the interim, and the deck mold was designed for the new hull mold. This is the boat I learned to sail and race on, crewing and then steering for my father. My father was forever experimenting with new control system ideas and implementing them with cheap or homemade fittings. For example, he had the first pre-bender on an Albacore (we were protested for having it at the 1973 North Americans, but won the protest by pointing out that if you allowed mast rams, how could you not allow a bender), and it was one of the first boats I remember having a transom bridle and vang sheeting. However good were some of the ideas, the implementation left some things to be desired. I was frequently annoyed racing the boat when systems would break or stop working, and I promised myself that when I had my own boat, it would be properly rigged.
The boat was stored upside down outdoors for almost ten years after my father’s death, and then converted to cottage use by removing virtually all the control systems. I saw the boat at my Uncle’s cottage, decided it deserved better, and brought it home with me. My initial work was directed towards making the boat sailable and raceable again, by restoring some – but not all – of the control systems; I was unable to replicate my father’s transom bridle system that had an adjustable height and adjustable off-center gybe capability. This was primarily accomplished by rigging them with high quality fittings so that they worked reliably. I purchased a Waterat CB, a stiffer boom, replaced the blocks with decent ball bearing blocks, bought some JC sails and went racing. For the first time ever, the control systems actually worked! However, the boat felt awful! It was like sailing a rubber Albacore; everything moved or vibrated as the boat went through the water, and it could not carry any rig tension. Based on my experience in 505s I decided that the boat would do better with some structure inside it, even if this meant carrying the extra weight around, and it also needed up-to-date Albacore control systems.
To go back to the why: This is probably mostly between my father and I. I hope he approves.
Starting Point
A 1973 uncored Skene hull (built in the mold prior to the hull mold built from the Canadian National Research Council plug), with a mid ’70s Skene racing deck fitted. This particular deck had custom aluminum tube stiffeners from the chainplates to the mast gate, rather than the standard plywood reinforcements. It also had a tube from the mast step to the mast gate. Two foam-cored stringers – one on each side – running from near the mast step almost to the transom, had been added to the floor in an effort to stiffen it. Controls were outdated and built using cheap blocks and poor quality line. The boat had a 1983 Proctor D, the original ’73 gold anodized round section Proctor boom, a Hovercraft products “racing” CB reshaped and refinished by my father, a laminar flow section CB built by my father, and an intriguing rudder also built by my father. It had two suits of old sails. The boat could not carry rig tension, as it would bend under any rig tension – or other – loads. The jib halyard was tensioned by a magic box and was not easily adjustable while racing. The mast had rod shrouds with some noticeable kinks in them. The boat did have easily adjustable mast ram, mast pre-bend and cunningham controls, and had quite inboard and aft jib sheeting, features, which I wanted to retain.
Any Albacore that does not already have diagonal bulkheads could be a candidate for a similar effort. A Skene or Ontario Yachts Albacore newer than 4862 may benefit from a smaller scale effort. And would not need all the work that was done to 4862.
Design Objectives and Alternatives
The design objective was to stiffen the boat so it could carry some rig tension, stop the CB trunk flexing and reduce twisting in the hull. Fully coring an existing hull to create a monocoque structure being quite impractical, I chose to build structure into the boat. Ideally, the structure would deal with the following:
- Upward load from shroud on chainplate – resolved as compression along deck to mast gate and tension from chain plate to mast step.
- Upward load from jib halyard on bow fitting- resolved as compression along centerline back to mast gate and tension from bow fitting to mast step.
- Sideways load at bottom of CB trunk from CB in closehauled down position
- Opposite sideways load at top of CB trunk from CB in closehauled down position
- Downward load on side decks from hiking skipper and crew
- Sideways loads from rudder – resulting in twisting on the hull
- Loads from fittings/controls
- Hull panel stiffness
I chose to not address the twisting loads from the rudder, and the hull panel flexing, as it would have taken too much time and money to do, and would have added too much weight to the boat.
Tube (compression) and wire (tension) structures could in theory handle much of the load, but I thought they would be difficult to install. In particular the bow tank would be in the way of a tension member from the bow fitting to the mast step. Also the earlier system of aluminum tubes had simply been glass taped in, and had been quite unsuccessful. I therefore chose to build bulkheads, selecting full height diagonal bulkheads that went from the shroud chainplates to where they met on centreline, just forward of the mast gate, a centreline bulkhead going from the centreline just forward of the mast gate to the bow (over the bow tank), and a large box thwart just aft of the CB handle when the CB was in the full down position.
Several construction alternatives were considered including plywood/epoxy, plywood/ glass/epoxy, and glass/foam/epoxy or glass/honeycomb/epoxy bulkheads. After going back and forth on this for awhile, I decided on foam/glass/epoxy. Since I was unwilling to seriously contemplate vacuum bagging, I turned to a boatbuilder – Larry Tuttle at Waterat Sailing Equipment – to make the bulkheads based on the templates I made. Larry suggested that aircraft plywood/epoxy would be better than the glass/foam/epoxy, and was able to provide unfinished plywood bulkheads based on paper versions of my templates. I was working in a townhouse one car garage and had limited tools, so it was easier to have the builder make these parts for me.
Larry Tuttle also recommended taping in the bulkheads with two layers of seven ounce tape on either side of the bulkhead, when glassing them in, and provide a great deal of useful information on many aspects of the rebuild.
Preparation
Removing existing structure
The original aluminum tube reinforcements glassed to the underside of the deck – which had not been all that effective – were pried out. The existing thwart – two pieces of spruce (this had been a slightly customized Skene and did not have the standard Skene thwart, just the Skene CB cap, with a thwart my father had built) – was removed with a large hammer. Most fittings were removed. The existing Elvstrom (Andersen) bailers were removed as the new thwart front face would go in right across their location. The resulting holes in the bottom were glassed in. A number of other holes through the hull, from hiking strap and fittings mounts, were filled in.
Grinding out interior
I had always disliked the spattered gelcoat interior finish of this era of Skene Albacore and was determined to remove it, so I could paint the interior and put a better non skid surface on it. I was also hoping to reduce the weight slightly by grinding out the spattered gelcoat, to partly compensate for the weight of the structures I was adding.
I also had to prepare portions of the boat to have structure bonded in to them, which involved grinding through the gelcoat into glass cloth in these areas. I spent a total of approximately 15 hours grinding out the interior of the boat, including portions of the underside of the foredeck (where I would bond in the centreline frame), the top of the bow tank (centerline), the floor, transom, and portions of the sides above the seat tanks that I could reach with a large grinder. The stringers in the boat were ground out from the mast step back to where the front face of the thwart would be. This job required a Tyvec suit, dust mask and goggles, and was the most uncomfortable task due to the itching caused by fibreglass dust.
Removing mast step
I had intended to leave the original mast step and bond the bulkheads into the boat around it, but discovered that the original mast step wood (inside the fiberglass) was completely rotten. Therefore the original mast step was ground out as well, and a new mast step became a necessary part of the design.
Patterns
Since the patterns did not change with the selected bulkhead and thwart material, I made full sized fitted patterns for all pieces, using foam core board. These were cut to be reasonable but not perfect fits. The fibreglass tape can fill small imperfections -gaps of say 1/2 inch or less – when the bulkheads are bonded in. The centreline frame, diagonal bulkheads and mast step pretty much line up with the loads identified earlier, while the thwart supports the CB handle in the full down position, while leaving room for the crew forward of the thwart. I chose to build the mast step to maximum height allowed by class rules, both as this resulted in a stronger structure, and to allow the mast to be raked further aft within the class rule specified fore and aft ranges for mast step and mast at deck level. The patterns came to:
- 1 x centerline bulkhead
- 2 x diagonal bulkheads
- 1 x mast step
- 2 x thwart forward face bulkheads
- 2 x thwart aft face bulkheads
- 2 x thwart tops
- 2 x thwart extension forward faces
- 2 x thwart extension aft faces
- 2 x thwart extension tops
- 2 x deck supports to tie deck and hull sides together just aft of shroud chainplates (these were ultimately not used)
The patterns were the plywood components only, and did not include various local reinforcements, for example where one piece was bonded to another. These were figured out later.
Completing the bulkheads
Waterat provided a complete set of bulkheads in gorgeous mahogany aircraft plywood. I carefully fit them to the boat (they were deliberately made very slightly oversized), and then set about coating them with WEST epoxy. By now we were in the depths of a Washington DC “winter”, and I was working in a corner of the garage with a heater keeping that corner warm enough for the epoxy to cure. It took quite some time to coat the bulkheads. I would coat, sand – sanding through the epoxy in a few places – recoat, sand, repeat. In retrospect, I should have used West foam rollers and squeegees rather than disposable brushes, and should have put on several thin coats and then sanded just to smooth the outer layer. If you recoat within 24 hours, you do not have to sand the earlier epoxy first. This job could have been completed in quite a bit less time.
Bonding in bulkheads
Bonding the bulkheads in was interesting. The first bulkhead would be easy, as the boat was so flexible that one could “bend it open” and stick in the bulkhead, but as each bulkhead was bonded in, the boat would stiffen, making it harder to fit the remaining pieces in place. This was not a concern for the thwart pieces, which were easy to fit, but was for the centreline, mast step and diagonal bulkheads. While fitting and measuring, I realized that I had made an unfortunate assumption about mast step and mast gate location. I had fitted the bulkhead patterns such that I could step the mast further forward than it had been, and could open up the mast gate to allow more mast bend. I checked the class rules and learned that the Skene Albacore had been built well within the class rule tolerances, and though I was extending the range, my bulkheads as designed would prevent me from stepping the mast as far forward as class rules allowed, and would not allow the mast gate to go as far forward as class rules allowed either. Fortunately, I was able to alter the fitting of the thwarts slightly to allow me to step the mast further – but not to the maximum – forward. Similarly the mast gate is open further forward than the Skene, but not to the maximum allowed by class rules.
The centreline bulkhead was the first to be bonded in. This was a challenge, as I had to keep it straight while taping it in (I temporarily screwed a stiffener to it) and avoid deforming the bow tank while I was lying on it taping in the bottom of the centreline bulkhead. I then had to turn the boat upside down to tape the top of the centreline bulkhead to the deck. I then flipped the boat back upright, removed the temporary stiffener, and filled the screw holes where it had been attached.
I next bonded in the mast step, which was essentially a continuation of the centreline bulkhead though made of slightly thicker plywood. All parts with the exception of the centerline bulkhead were thick, while the centerline bulkhead, which was in the bow, was only thick to save a little weight in the ends. The mast step was reinforced with sitka spruce blocks, with the grain aligned vertically. These were “sandwiched” around the centerline bulkhead to mast step butt join, with a layer of fibreglass cloth in between the sitka and the centerline bulkhead/step, on either side.
The centerline bulkhead had a sitka spruce strip on either side of the back edge, to bond the diagonal bulkheads to. Since the centerline bulkhead was fully taped in – and had to be as there would be no access once the diagonals were bonded in – the deck and floor were now tied together, and the boat was much less flexible, making fitting the diagonal bulkheads quite a challenge. With a little more fitting and some judicious use of brute force, one and then the other diagonal bulkheads were positioned in place and taped in to the floor, and to the back of the deck. The boat was then flipped upside down again, and the diagonal bulkheads taped to the underside of the deck. The diagonals were taped to each other using wider tape which strengthening the vertical join just in front of where the mast would be.
Bonding in the thwart
An old centerboard was put into the trunk to align it, and new sitka spruce strips were bonded underneath the CB cap (from the front aft to the back of the new thwart), replacing the original wood which had rotted out.
The boat was then raised on sawhorses. Plumb bobs were dropped from the bow and stern, the boat was levelled at the shrouds and bow (fortunately they matched) and a centerline marked on the garage floor. The centerboard was pulled part way down, and forced onto the centerline (it was significantly off), and a temporary thwart to keep the CB cap/trunk on centerline was installed.
The boat was lowered, and the fore and aft thwart faces were taped in. Then sitka spruce reinforcements were bonded to the inside top edges of the thwart faces, to support the thwart tops.
At this point, I was going sailing out of the country for a month, and elected to drop both the Albacore and my 505 off with a boatbuilder for some work and maintenance respectively. My 505 was having its woodwork refinished, and it seemed easy enough to have the builder do the wood already installed in the Albacore at the same time. I also had the builder vacuum bag some foam core to the floor of the boat, between the diagonal bulkheads and the forward thwart face. This cored area was primarily to reinforce the hull to withstand the sideways loads from the CB at the bottom of the CB trunk, but had the added benefit of very significantly stiffening the floor of the boat in this area. Both boats returned in good shape. The Albacore had the wood already installed clear coated with Interthane Plus, a two part linear polyurethane, and the interior of the boat painted with Interlux one part polyurethane, with a non skid finish on the floor.
I then bonded in the thwart extension faces. These extend the thwart from the inner edge of the seat tank, up to the side decks. Taping the tops to the underside of the side decks required the boat to be flipped upside down again. I also bonded in sitka spruce reinforcements to support the bonding in of the thwart extension tops.
Fabricating Cleat/block Trays
Since I wanted to lead control lines to either side partly underneath the thwart, with the cleats underneath, I next had to fabricate trays to support the cleats and turning blocks. This came to four trays, two inside the thwart near centerline to turn the control lines running for and aft to go out along the thwart, and to cleat the lines, and two more in the thwart extensions. A reversible wooden form wrapped in wax paper was used as a male mold, with more waxed paper and blocks of wood on the outside, the part placed inside the thwart and clamps to hold it together. Though extremely primitive, this worked well enough to create the four trays.
The design supports four control lines led to either side, with the control line emerging through a slot in the thwart top face, and going from there to a slot in the thwart extension. The control lines are then turned aft under the side decks, for shockcord takeups. Two control lines come to the thwart from forward of the thwart and two come from aft of the thwart. This would allow me to lead jib halyard and shrouds from aft, and vang and one of mast ram, mast pre-bend, cunningham or outhaul from forward of the thwart.
Completing the thwart and thwart extensions
The cleats and turning blocks were then installed on the cleat trays, and the cleat trays temporarily installed in the thwarts. The thwart tops and thwart extension tops were fitted and where the slots for the control lines should be was determined. This was done by running whipping twine through the cleats and blocks, tensioning them and measuring where they intersected the planes of the thwart tops and thwart extension tops. Since I was concerned about the strength and stiffness of the thwart tops with long slots cut in them, I glassed the inside faces of the thwart tops (the only portions of the bulkheads so reinforced), and put a further reinforcement of 2″ glass tape from front to back of each thwart top, just outboard of where the slots would end. The thwart and thwart extension tops then had the slots cut in them and epoxy sealed. The cleat trays were then removed, and the thwart tops and then thwart extension tops bonded and glass taped in. The edges were rounded with a router, and glass taped. The glass tape was sanded flush with the top surfaces of the thwart and thwart extensions (so the crew could slide on the thwart without catching on an edge).
Clear Coating Remaining Wood, Painting Bare Glass
Finally the wood not already clear coated (thwart tops and all of thwart extensions) was clear coated with Interthane Plus two part polyurethane. I used three coats of Interthane Plus, sanding between coats. After experimenting with brushes, foam brushes – they dissolve – and rollers, I suggest a roller, followed by dragging a brush across the wet coating, to burst all the air bubbles. My finish is far from perfect, but the Interthane Plus wants to form a super high gloss smooth finish. I believe the surface finish would have been noticeably better if the work had been done in a dust free environment like a spray paint booth, rather than my (by now VERY dusty) garage.
After the Interthane Plus coating had cured, I masked off around the wood, and primed and painted the ground out areas around where each wooden piece had been bonded in. One could prime and paint the entire boat, for a consistent appearance, but this would add more weight. Actually, some portions of the boat: the floor, and the areas that would be enclosed by the thwart and the thwart extensions, had to be painted before the thwart tops and thwart extension tops were bonded in.
That concluded the construction phase of the project. All that remained was rigging the boat.
Rigging
With Barney Harris’s encouragement, I trailed the boat to Barney’s and parked it next to his Albacore in the driveway. With Barney providing advice at every stage, and doing all the splicing, we then started rigging the boat. Barney and Becky also provided beer – essential for getting any work done – and dinner most evenings. While on the subject of beer… one night we switched for the second and subsequent beers to a “lite” beer, and the quality of our work dropped markedly. In fact Barney made several redundant splices, and much of the work had to be redone. We never made that mistake again, sticking with the high quality stuff all evening.
The vang and the jib halyard are led to each side. Eventually adjustable shrouds will be rigged to each side, and the fourth position on each thwart will be left for future use. The outhaul and cunningham are led to the CB cap just aft of the mainsheet swivel. The centerboard up line is a 3:1 led aft along the top of the CB trunk to the thwart and turned to starboard (for use when bearing off on a port rounding at a windward mark) along the aft edge of the thwart. The line continues aft, crosses the boat, and goes forward to the port side of the thwart, where it becomes a 2:1 CB down control.
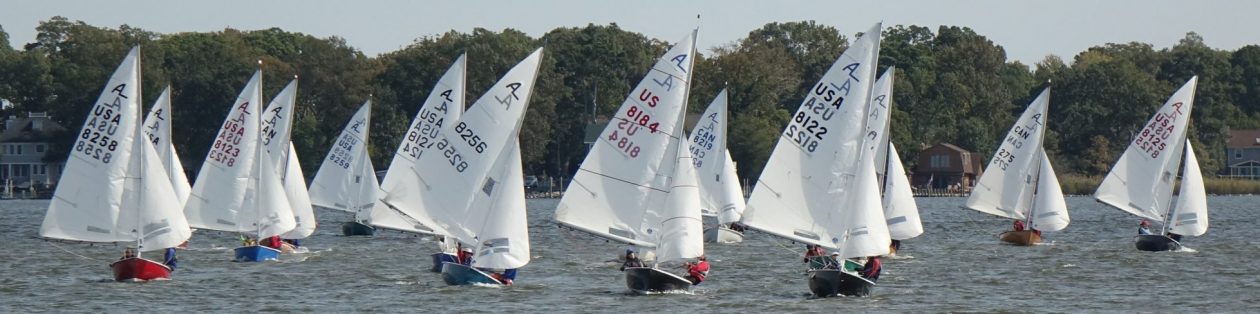
The rigging is not currently – November 9, 1998 – complete. The shockcord takeups for the vang, jib halyard and centerboard lines have not been rigged. Though the mast ram track, car and strut are rigged, no control lines are yet. The centerboard trunk upper opening varies in width, and the CB jams at both the full up and full down position. A fair bit of work remains to complete the boat, but it was complete enough to race the last race of the 1998 season, the PRSA Fall Frostbite. The last time the boat was in the water was the PRSA Fall Frostbite two years ago, which the boat won. After two years of rebuilding, the boat was able to win (narrowly) the Fall Frostbite again. It was over 2000 numbers older than the second oldest boat racing.
Results
I have only sailed/raced the boat once, so results are rather preliminary. The boat is still very flexible aft of the new thwart where no new structure has been added. It appears to be quite stiff forward of the thwart. This stiffness appears to be both in terms of panel stiffness – quite a bit less deflection when a wave hits that portion of the hull, or the crew walks on it – and in the boat’s ability to avoid twisting and bending due to loads. For example, when the boat was tied down to the trailer before the rebuild, you could keep tightening the strap and notice the boat bending. Now you pull the strap until it is quite tight and cannot pull it any harder, with no discernible movement. I hope to measure the rig tension as soon as the new shrouds are rigged I am also looking forward to racing the boat in waves to see how the hull feels.
I have not yet weighed the boat. The last time it was weighed, some time before the rebuild, it was close to minimum weight.
Purchases
- Sails from JC Sails in Kingston, Ontario
- Waterat CB
- Proctor boom
- Padded hiking straps for the crew
- All new lines (1/8″ vectran, 5/32 Marlow super prestrech, Crystalyne
- All new blocks (mostly Ronstan Series 19)
- Lots of fasteners
- Aircraft plywood bulkheads
- West Epoxy
- Glass cloth (mostly 2″ tape)
- Clear Interthane Plus, thinner, and fiberglass solvent wash
- Interlux Brightside Polyurethane primer and topcoat
- Assorted Tools
- Paint brushes, glue brushes, gloves, rollers, etc.
Future Purchases
- New rudder, current rudder is heavy and slightly warped
- New tiller
- A few more blocks and lines
Costs
No idea, I don’t want to know. Neither do you if you are considering a similar project.
Time
I did not keep track of the hours. LOTS! The job could be done in considerably less time by using glass and foam bulkheads, and knowing how all the parts would fit beforehand.
What I would do differently next time
Do not waste anytime trying to determine what fittings can stay and what must come off. Sooner or later they all have to come off, the job is easier if you take them all off at the beginning, and fill all the holes. The chances are that none of them will go back in exactly the same spot.
I would make the bulkhead and thwart out of foam/glass/epoxy to avoid the epoxy coating and clear finishing steps required for the wooden parts. However, foam/glass/epoxy bulkheads might be so stiff that you would not be able to bend the diagonal bulkheads when forcing them into place. You might consider taking the deck off to allow easier access into the hull to build in bulkheads.
If you do choose aircraft plywood, the two faces are slightly different. One is a darker mahogany, the other lighter. If you want each visible face (with the exception of the mast step each piece is only seen on one face) to be the darker – I like it better – face, you would have to lay out the panels that way. This may require slightly more plywood.
Use a maximum CB trunk width shim, the full length of the CB trunk, while fitting and bonding in reinforcements. The trunk was not consistent width before I started, but the boat was flexible enough that the board could go up and down (with a little forcible encouragement). The structure now prevents the CB cap from bending, and restricts the movement of the centerboard. I have to sand the CB cap to open the CB cap opening up to a consistent – and class maximum – width. I did use an old centerboard as a shim, but it was not maximum width.
Remember that you are fixing up an old beat up Albacore, and are not trying to build a piece of furniture (not that I could have, but I could have worked a lot faster).
Consider moving the three way join between the diagonal bulkheads and the forward centerline bulkhead an inch or two further forward to allow the mast to be stepped at the maximum class allowable distance forward, and to allow for a maximum length mast gate. However, this will require the diagonal bulkheads to go in at an angle that does not match the aft edge of the Skene racing deck, so the top of the bulkhead will have to be fastened to the inside surface of the foredeck some other way that what I was able to do. My design has the bulkhead flush with the inside surface of the lip on the back of the foredeck.
Don’t spend hours staring at the boat at various stages in construction, imaging it completed (a couple of minutes is good).